Important safety devices! Ensure correct function, maintain in accordance with instructions and DO NOT disable!
DO NOT use with compressed gas cylinders! Conforms to relevant legislation and safety standards Environmental ProtectionAir tools must not be disposed of with household waste. Air tools may contain traces of tool oil and other lubricants and so must be recycled accordingly
Specification Working pressure . 4 – 7.5bar (60 – 108psi) Maximum pressure . 7.5bar (108psi) Air inlet . 1⁄4" quick connector Nail Size . 8 Gauge, 10 – 50mm Nail capacity . 100pce Weight . 1.32kg Sound and vibration information: Sound pressure LPA . 96,0dB(A) Sound power LWA . 83,0dB(A) Uncertainty K . 3dB Weighted vibration . 2.2m/s Uncertainty K . 2m/s As part of our ongoing product development, specifications of Silverline The sound intensity level for the operator may exceed 85dB(A) and products may alter without notice. sound protection measures are necessary. SpecificationWARNING: Always wear ear protection where the sound level exceeds 85dB(A) and limit the time of exposure if necessary. If sound levels are uncomfortable, even with ear protection, stop using the tool immediately and check the ear protection is correctly fitted and provides the correct level of sound attenuation for the level of sound produced by your tool.
WARNING: User exposure to tool vibration can result in loss of sense of touch, numbness, tingling and reduced ability to grip. Long term exposure can lead to a chronic condition. If necessary, limit the length of time exposed to vibration and use anti-vibration gloves. Do not operate the tool with hands below a normal comfortable temperature, as vibration will have a greater effect. Use the figures provided in the specification relating to vibration to calculate the duration and frequency of operating the tool.
Sound and vibration levels in the specification are determined according to EN60745 or similar international standards. The figures represent normal use for the tool in normal working conditions. A poorly maintained, incorrectly assembled, or misused tool may produce increased levels of noise and vibration. www.osha.europa.eu provides information on sound and vibration levels in the workplace that may be useful to domestic users who use tools for long periods of time.
Carefully read and understand this manual and any label attached to the tool before use. Keep these instructions with the product for future reference. Ensure all persons who use this product are fully acquainted with this manual.
Even when used as prescribed it is not possible to eliminate all residual risk factors. Use with caution. If you are at all unsure of the correct and safe manner in which to use this tool, do not attempt to use it.
General Safety WarningsWARNING Read all safety warnings and all instructions. Failure to follow the warnings and instructions may result in electric shock, fire and/or serious injury.
WARNING: This appliance is not intended for use by persons (including children) with reduced, physical or mental capabilities or lack of experience or knowledge unless they have been given supervision or instruction concerning use of the appliance by a person responsible for their safety. Children must be supervised to ensure that they do not play with the appliance.
Save all warnings and instructions for future reference.1) Work Area Safety a) Keep work area clean and well lit. Cluttered or dark areas invite accidents. b) Do not operate tools in explosive atmospheres, such as in the presence of
flammable liquids, gases or dust. c) Keep children and bystanders away while operating a powered tool. Distractions can cause you to lose control. 2) Personal Safety a) Stay alert, watch what you are doing and use common sense when operatinga powered tool. Do not use a powered tool while you are tired or under the influence of drugs, alcohol or medication. A moment of inattention while operating
a powered tool may result in serious personal injury. b) Use personal protective equipment. Always wear eye protection. Protectiveequipment such as dust mask, non-skid safety shoes, hard hat, or hearing protection used for appropriate conditions will reduce personal injuries.
c) Prevent unintentional starting. Ensure the switch is in the off-position when not operating the tool and make use of other safety features which prevent unintentional starting d) Remove any adjusting key or wrench before turning the powered tool on. A wrench or a key left attached to a rotating part of the tool may result in personal injury. e) Do not overreach. Keep proper footing and balance at all times. This enables better control of the tool in unexpected situations. f) Dress properly. Do not wear loose clothing or jewelry. Keep your hair, clothing and gloves away from moving parts. Loose clothes, jewelry or long hair can be caught in moving parts.
WARNING : User exposure to tool vibration can result in loss of sense of touch, numbness, tingling and reduced ability to grip. Long term exposure can lead to a chronic condition. If necessary limit the length of time exposed to vibration. Use the figures provided in the specification relating to vibration if provided to calculate the duration and frequency of operating the tool. The 2002/44/EC directive relating to vibration in the workplace may provide useful information even for domestic use of tools. In the first instance of feeling uncomfortable due to vibration STOP using the tool immediately.
WARNING : Always wear ear protection where the sound level exceeds 85dB(A) and limit the time of exposure if necessary. If sound levels are uncomfortable even with ear protection stop using the tool immediately and check the ear protection is correctly fitted and provides the right level of sound attenuation for the level of sound produced by your tool.
3) Tool Use and Care a) Maintain tools. Check for misalignment or binding of moving parts, breakage of
parts and any other condition that may affect the tool’s operation. If damaged, have the tool repaired before use. Many accidents are caused by poorly maintained
b) Keep cutting tools sharp and clean. Properly maintained cutting tools with sharp cutting edges are less likely to bind and are easier to control. c) Use the tool’s accessories and tool bits etc. in accordance with these instructions, taking into account the working conditions and the work to be performed. Use of the tool for operations different from those intended could result in a hazardous situation. 4) Service a) Have your tool serviced by a qualified repair person using only identical replacement parts. This will ensure that the safety of the tool is maintained. Air Tool Safety Protect your yes • Always wear safety goggles or safety glasses Protect your hearing • Always wear ear protection Protection from vibration• Hand-held air tools may produce vibration and should not be used for long periods without a break. Vibration can cause ill health. Gloves may help to maintain good blood circulation in the fingers.
Protective clothing• Always wear appropriate protective equipment including but not limited to overalls, gloves, face mask etc
• It is the user’s responsibility to ensure that other persons in the vicinity of the work area are also equipped with the appropriate protective equipment
Use the correct air hose • Use lightweight hose to connect the tool to the air compressor • Most air tools should be fitted with a coil hose. Always disconnect • Ensure that your air tool has completely stopped functioning before putting it down• Disconnect an air tool from the air supply before performing any servicing, or changing any blades, discs, or other attachments
• Ensure blades, discs or attachments are correctly fitted before reconnecting to air supply• Ensure the air tool is switched OFF before connecting to air supply. Be aware that air tools may hold residual pressure after use. Always bleed air pressure from the tool after shutting off air supply
Do not abuse the machine• Do not overload the machine. Allowing the machine to work at its optimum speed is more efficient and prolongs its service life
• Do not increase air pressure above the recommended level; excessive pressure leads to wear of moving parts, possible failure and may cause the machine casing to split
• Do not attempt to modify air tools. Any attempt to modify this air tool could result in serious injury to you or others, and will invalidate its warranty
• Do not aim the nailer away from the workpiece when connected to an air supply Never operate the tool with the safety mechanism disabled• Never aim the tool towards other people in the work area or towards the main reservoir tank of the air compressor
Do not operate the nailer when using ladders or scaffolding• Never connect this tool to canisters or bottles containing combustible gases or portable compressed air canisters or cartridges. It is designed to be used with an air compressor
Product Familiarisation1 Trigger 2 Air Inlet / ¼” BSP Quick Connector 3 Air Tool Oil 4 Magazine Latch 5 Magazine Cover 6 Safety Catch 7 Hex Keys 8 Screws 9 Exhaust Direction Dial
www.silverlinetools.com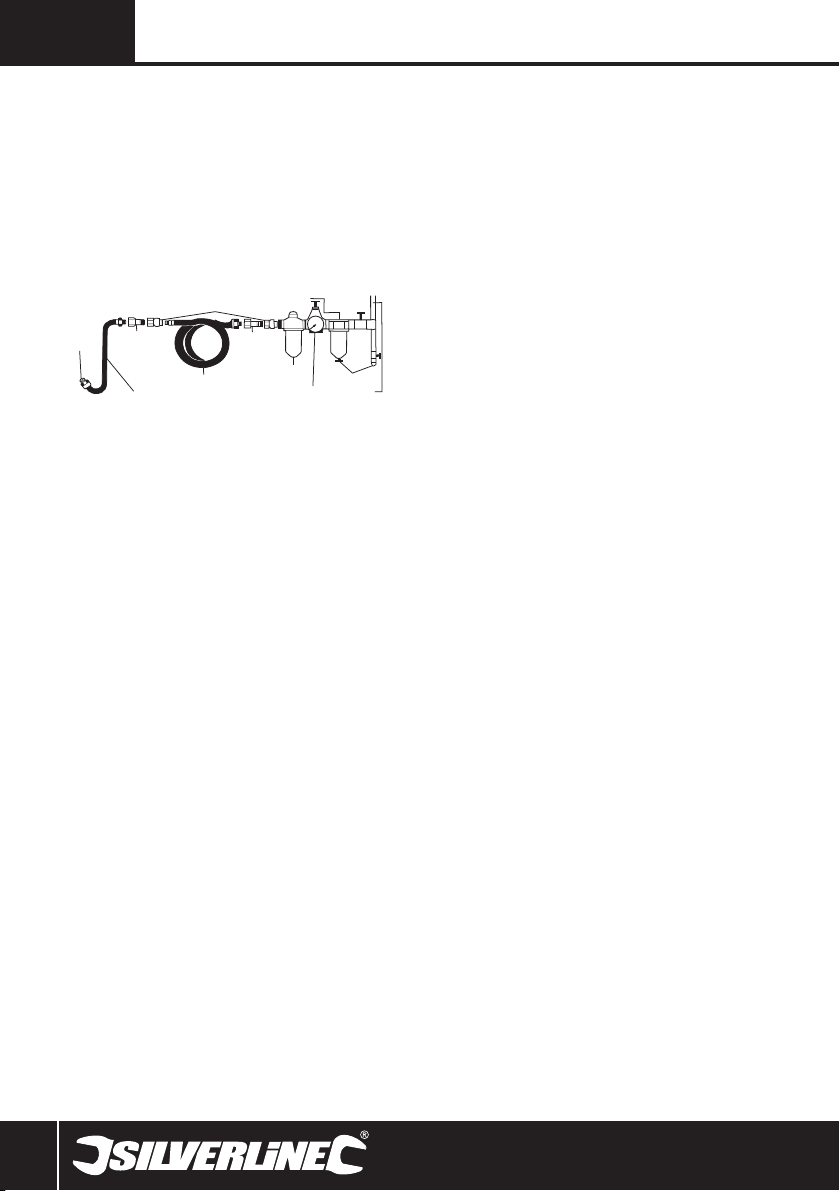
• Ensure that all parts of the tool are present and in good condition. If any parts are missing or damaged, have such parts replaced before attempting to use this tool.
Before Use Installing the Quick Connector• Fit the Quick Connector (2) to the nailer. The connector is a screw fit into the Air Inlet. Applying PTFE tape to the screw threads will help to maintain an air tight seal. Air lines fitted with matching ¼" connectors will now be a push fit
Recommended air supply QUICK COUPLER LEADER HOSE • This tool should be connected to a clean air supply with an in-line oiler and water separator • DO NOT allow supply pressure to exceed the maximum stated in the specification• Always select the lowest supply pressure suitable for the task. This will reduce sound and vibration for the operator. It will also decrease wear of the tool and the chance of tool failure
• Always use an air filter with the machine. Without an air filter, air is likely to have a higher water content that will rapidly corrode the internal working parts of this machine and will shorten its working life significantly. Water collects in the compressor tank and will cause serious corrosion. The tank must be drained on a daily basis to prevent water build-up in the air supply
• Ensure all parts of the system (hoses, couplers, etc.) are correctly rated for the air pressure to be used
• If an automatic oiler (as per diagram below) is not used, pour two drops of air tool oil into the air inlet of the quick connector before each use
CAUTION : Only use oil formulated for air or pneumatic tools. Never substitute other oils which may damage this tool and the compressor or are not suitable for contact with the operator of the tool. DO NOT use 2-stroke or automotive oil.
Checking the safety catch WARNING : Always disconnect the tool from the air supply before any adjustment or maintenance is carried out. • Ensure that there are no fasteners in the magazine • The Safety Catch (6) should move in and out with no obstruction • Test the safety catch is operating correctly as follows: 1. Connect the tool to the air supply 2. Push the Safety Catch (6) against a piece of wood without pulling the Trigger (1). The tool should not fire. If the tool fires, it must be repaired before further use 3. Hold the tool away from the piece of wood. The Safety Catch (6) should return to the original position 4. Pull the Trigger (1). The tool should not fire. If the tool fires, it must be repaired before any further use 5. Push the Safety Catch (6) against the piece of wood, but this time pull the Trigger (1). The tool should fire. This indicates normal operation Loading the magazine WARNING : Always disconnect the tool from the air supply before any loading, adjustment, or maintenance is carried out. 1. Open the Magazine Latch (4) and open the Magazine Cover (5) 2. Insert fasteners into the magazine, ensuring the point of the fastener is facing forward (away from the handle of the tool) 3. Close the magazine cover until the latch (4) is fully secured (you will hear a ‘click’) RECOIL HOSE WATER SEPARATION DRAIN DAILY AIR SUPPLYWARNING : Ensure your compressed air supply operates within the pressure range stated in “Specifications”.
Firing trigger• To operate the nailer, press the Safety Catch (6) against the material. Holding the nailer firmly by its handle, squeeze the Trigger (1) to fire the nail into the material
WARNING : Rapidly pressing the firing trigger could cause internal damage and may invalidate the guarantee.
• Rotate the Exhaust Direction Dial (9) to direct the exhaust air away from the operator Nail depth adjustment IMPORTANT : Always test the fastener will penetrate by the correct amount. 1. Fire a test nail into a piece of scrap material and examine the penetration depth of 2. If necessary, adjust the air supply pressure to change the nail penetration depth: reducing the air supply pressure will reduce the depth that the nail penetrates. Clearing jams WARNING : Always disconnect the tool from the air supply before any adjustment or maintenance is carried out. Fastener jammed in magazine 1. Open the Magazine Latch (4) and the Magazine Cover (5) 2. Remove the obstruction using pliers 3. Reload the magazine and close securely Fastener jammed in plate area 1. Remove the Screws (8) and then remove the nose cover using the Hex Keys (7) supplied. The safety lever can now be removed. Remove screws and remove main plate 2. Remove the obstruction using pliers 3. Re-assemble the nose plates and check the operation of the safety lever before using the tool MaintenanceWARNING : Always disconnect the machine from the air supply before carrying out any maintenance or cleaning.
Note : Two hex keys are provided with this air nailer that are suitable for partial disassembly of this unit. These may be useful for cleaning, unjamming and replacing parts. Such disassembly is not covered by this manual.
WARNING : Never use third party spares with this product. Only use spares supplied by Silverline or an authorised Silverline stockist or repair centre.
• Keep your machine clean at all times. Dirt and dust will cause internal parts to wear quickly, and could reduce its service life
• Clean the body of your machine with a soft brush, or dry cloth • After each use, pour approximately 1.5ml of lubricating oil into the Air Inlet (2)• If the tool stops working or only works intermittently, pour approximately 1.5ml of lubricating oil into the Air Inlet (2), and connect to air supply. Operate the tool in short bursts. If this does not free the tool mechanism, have the tool serviced at an authorised Silverline service centre
• Store this tool carefully in a secure, dry place out of the reach of children • As with other power tools, air tools should not be disposed of with household waste • Air tools may contain traces of tool oil and other lubricants and so must be recycled accordingly• Contact your local waste disposal authority for information on the correct way to dispose of power tools

Register this product at www.silverlinetools.com within 30 days of purchase in order to qualify for the 3 year guarantee. Guarantee period begins according to the date of purchase on your sales receipt.
Terms & ConditionsGuarantee period becomes effective from the date of retail purchase as detailed on your sales receipt.
PLEASE KEEP YOUR SALES RECEIPTIf this product develops a fault within 30 days of purchase, return it to the stockist where it was purchased, with your receipt, stating details of the fault. You will receive a replacement or refund.
If this product develops a fault after the 30 day period, return it to: Silverline Tools Service Centre PO Box 2988 Yeovil BA21 1WU, UKThe guarantee claim must be submitted during the guarantee period. You must provide the original sales receipt indicating the purchase date,
your name, address and place of purchase before any work can be carried out.You must provide precise details of the fault requiring correction. Claims made within the guarantee period will be verified by Silverline Tools
to establish if the deficiencies are related to material or manufacturing of the product.Carriage will not be refunded. Items for return must be in a suitably clean and safe state for repair, and should be packaged carefully to prevent damage or injury during transportation. We may reject unsuitable or unsafe deliveries.
All work will be carried out by Silverline Tools or its authorized repair agents. The repair or replacement of the product will not extend the period of guaranteeDefects recognised by us as being covered by the guarantee shall be corrected by means of repair of the tool, free of charge (excluding carriage charges) or by replacement with a tool in perfect working order.
Retained tools, or parts, for which a replacement has been issued, will become the property of Silverline Tools.
Air Brad Nailer 50mm 868544 Air Brad Nailer 50mm Registering your purchaseRegistration is made at silverlinetools.com by selecting the Guarantee Registration button. You will need to enter:-
• Your personal details• Details of the product and purchase information Once this information is entered your guarantee certificate will be created
in PDF format for you to print out and keep with your purchase.The repair or replacement of your product under guarantee provides benefits which are additional to and do not affect your statutory rights as a consumer.
What is covered:The repair of the product, if it can be verified to the satisfaction of Silverline Tools that the deficiencies were due to faulty materials or workmanship within the guarantee period.
If any part is no longer available or out of manufacture, Silverline Tools will replace it with a functional replacement part.
Use of this product in the EU. What is not covered:Silverline Tools does not guarantee repairs required as a result of: Normal wear and tear caused by use in accordance with the operating
instructions eg blades, brushes, belts, bulbs, batteries etc. The replacement of any provided accessories drill bits, blades, sanding
sheets, cutting discs and other related items. Accidental damage, faults caused by negligent use or care, misuse,
neglect, careless operation or handling of the product. Use of the product for anything other than normal domestic purposes. Change or modification of the product in any way. Use of parts and accessories which are not genuine Silverline Tools
components. Faulty installation (except installed by Silverline Tools). Repairs or alterations carried out by parties other than Silverline Tools or its
authorized repair agents. Claims other than the right to correction of faults on the tool named in these guarantee conditions are not covered by the guarantee. CE Declaration of Conformity The undersigned: Mr Darrell Morris as authorised by: Silverline Tools Declares that Identification code: 868544 Description: Air Brad Nailer 50mm Conforms to the following directives and standards: • Machinery Directive 2006/42/EC • EN792-13:2000+A1:2008 Notified body: TUV Rheinland, Shanghai, China The technical documentation is kept by: Silverline Tools Date: 23/05/13 Name and address of the manufacturer: Powerbox International Ltd, Boundary Way, Lufton Trading Estate, Yeovil, Somerset, BA22 8HZ United Kingdom www.silverlinetools.com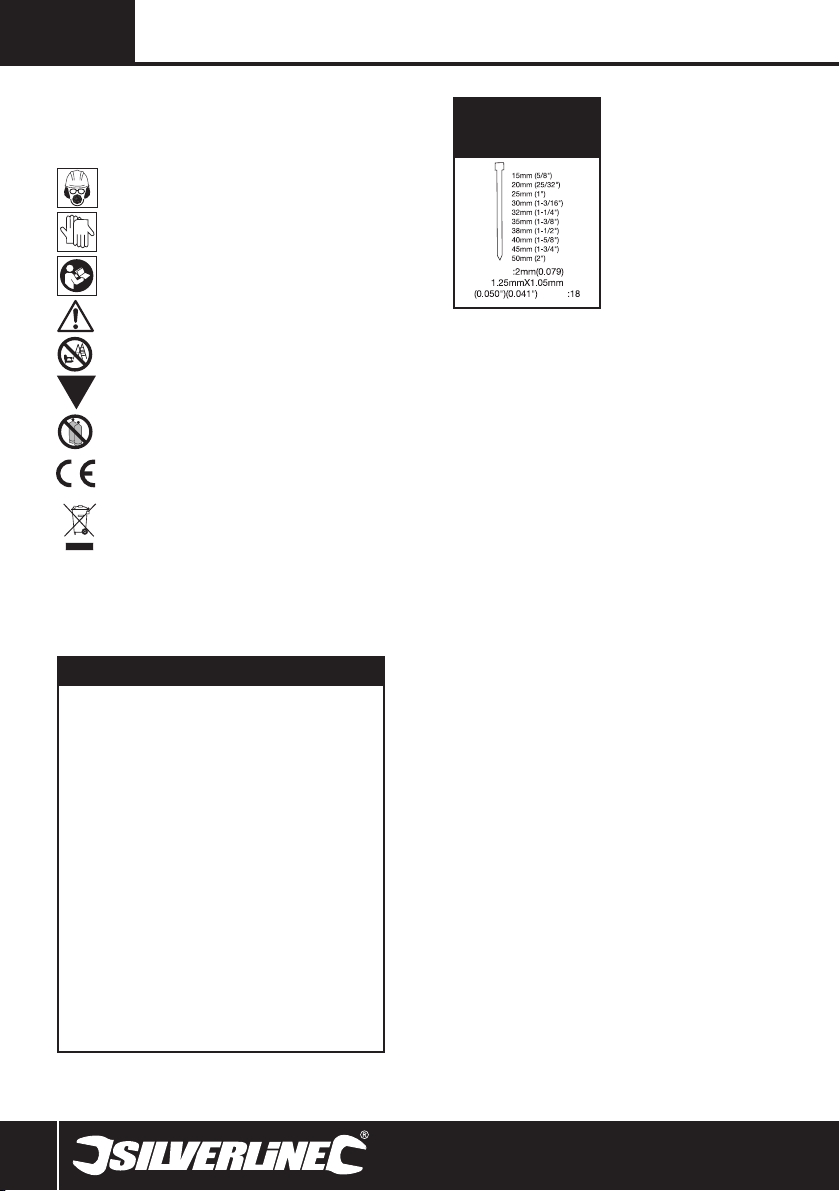
La plaque signalétique figurant sur votre outil peut présenter des symboles. Ces symboles constituent des informations importantes relatives au produit
ou des instructions concernant son utilisation. Port de protection auditive Port de lunettes de sécurité Port du masque respiratoire Port du casque Port de gants Lire le manuel d’instructions Ne pas utiliser sur une échelle ou un échafaudageImportant : dispositif de sécurité ! Vérifier son bon fonctionnement et bon état en accordance avec les instructions, et NE PAS le désactiver
Ne pas utiliser avec des bouteilles à air comprimé Conforme à la règlementation et aux normes européennes de sécurité pertinentes Protection de l’environnementLes produits à air comprimé usagés ne doivent pas être jetés avec les ordures ménagères. Veuillez les recycler dans les centres prévus à cet effet. Pour de plus amples informations, veuillez contacter votre municipalité ou point de vente.
Caractéristiques techniques Pression de fonctionnement : . 4 – 7 bar Pression maximale : . 7,5 bar Arrivée d’air : . 1⁄ 4 " BSP Clous : . Calibre 18 10 – 50 mm Capacité : . 100 clous Poids : . 1,32 kg Informations sur le niveau d’intensité sonore et vibratoire : Pression acoustique LPA : . 96,0 dB(A) Puissance acoustique LWA : . 83 ,0 dB(A) Incertitude K : . 3 dB Vibration pondérée : . 2,2 m/s² Incertitude K: . 2 m/s²Du fait de l’évolution constante de notre développement produit, les caractéristiques des produits Silverline peuvent changer sans notification préalable.
L’intensité sonore peut dépasser 85 dB(A) et il est nécessaire que l’utilisateur prenne des mesures de protection auditive.
SpécificationsAttention : Toujours porter des protections sonores lorsque le niveau d’intensité est supérieur à 85 dB(A) et limiter le temps d’exposition si nécessaire. Si l’intensité sonore devient inconfortable, même avec les protections, arrêter immédiatement d’utiliser l’appareil, vérifier que les protections soient bien mises et qu’elles soient adéquates avec le niveau sonore produit par l’appareil.
Attention : L’exposition de l’utilisateur aux vibrations peut engendrer une perte du toucher, des engourdissements, des picotements et ainsi réduire la capacité de préhension. De longues expositions peuvent également provoquer ces symptômes de façon chronique. Si nécessaire, limiter le temps d’exposition aux vibrations, et porter des gants antivibrations. Ne pas utilisez cet appareil avec vos mains sous des conditions en dessous de températures normales, car l’effet vibratoire en est accentué. Se référer au cas de figures des caractéristiques relatives aux vibrations pour calculer le temps et fréquence d’utilisation de l’appareil.
Les niveaux sonores et vibratoires des caractéristiques techniques sont déterminés en fonction de la norme EN60745 ou autres normes internationales. . Ces données correspondent à un usage normale de l’appareil, et ce dans des conditions de travail normales. Un appareil mal entretenu, mal assemblé ou mal utilisé peut augmenter les niveaux sonores et vibratoires. Pour plus d’informations sur la directive des émissions sonores et vibratoires, visitez le site http://osha.europa.eu/fr.
Lisez attentivement ce manuel ainsi que toute étiquette apposée sur l’outil et assurezvous d’en comprendre le sens avant utilisation. Rangez ces consignes avec l’outil, pour référence ultérieure. Assurez-vous que toute personne venant à utiliser cet outil ait attentivement pris connaissance de ce manuel.
Sachez qu’utiliser un outil conformément aux prescriptions ne garantit pas l’élimination de tous les facteurs de risque. Procédez avec prudence. N’utilisez pas cet outil si vous avez des doutes quant à la manière sûre et correcte de procéder.
Consignes générales de sécuritéAVERTISSEMENT Veuillez lire l’intégralité des consignes de sécurité et des instructions. Le non-respect de ces consignes et instructions peut entraîner un risque de
choc électrique, d’incendie et/ou se traduire par des blessures graves.Attention : Cet appareil n’est pas conçu pour être utilisé par des personnes (enfants compris) ayant des capacités physiques ou mentales réduites, ou n’ayant pas la connaissance ou l’expérience requise, à moins d’être sous la supervision d’une personne responsable de leur sécurité ou d’avoir reçu les instructions nécessaires. Les enfants ne doivent pas s’approcher et jouer avec cet appareil.